Articles
Stair Blocks: You Don't Need Them, but Here's How
July 30 2014
Here are a couple videos of snatch pulls from stair blocks using the rebound of the bar:
July 30 2014

There are a few pieces of equipment that you need in weightlifting. For example, a barbell and weights, a platform and a squat rack. That’s about it. Everything after that is a luxury. This isn’t to say that other things aren’t valuable—for example, blocks, jerk tables, risers, power rack… We have all of these things at Catalyst Athletics and get a lot of use out of them
Stair blocks are definitely a cool but unnecessary piece of gear. If you have space, time and few extra bucks, I’ll show you here how to make them and what to do with them. They’re about as easy to build as anything can be—it’s an hour of work at the most and you need limited tools.
Please note that my goal with these was to make them as inexpensive and quick to make as possible, not to impress you with my carpentry skills. I don’t have a lot of spare time, and I’m not a master carpenter. I’m not spending my Sundays perfectly planing wood and building half cross lap joints, especially when I can get the same functionality out of a piece of equipment with a tenth of the time and tools. I’d rather use that extra time to watch Norm do that stuff on New Yankee Workshop. If you’re more of a craftsman, there are fancier ways of doing this that will make it look nicer—and work exactly the same.
Materials List
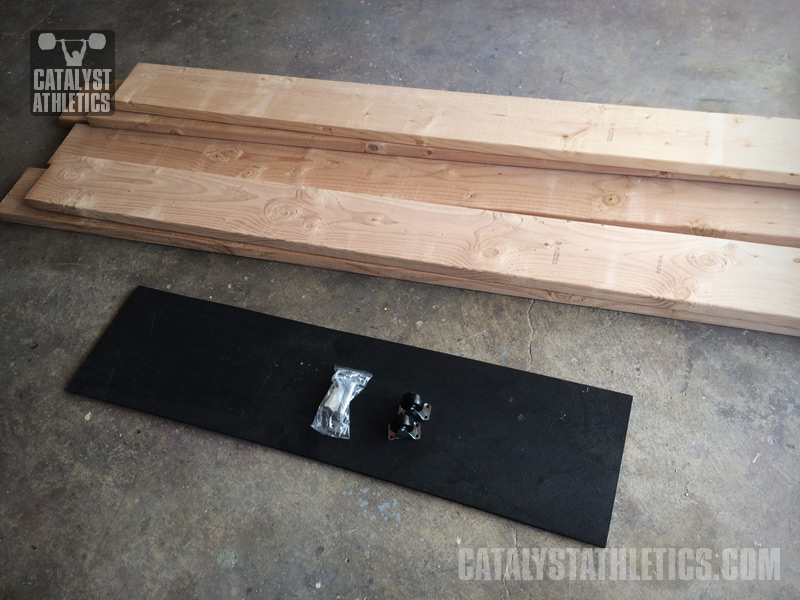
- (5) 2”x8”x8’ boards
- Rubber matting
- Screws
- (2) Casters (optional)
- (1) Gate Handle (optional)

Building
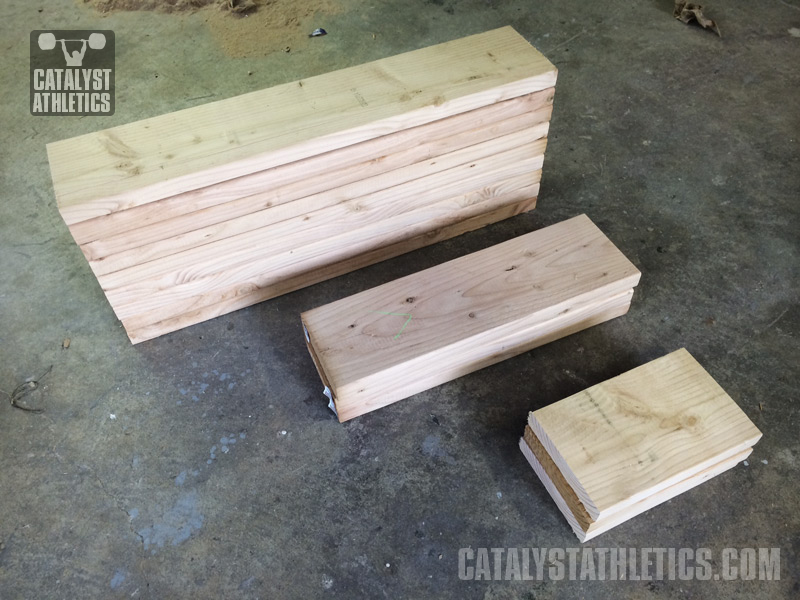
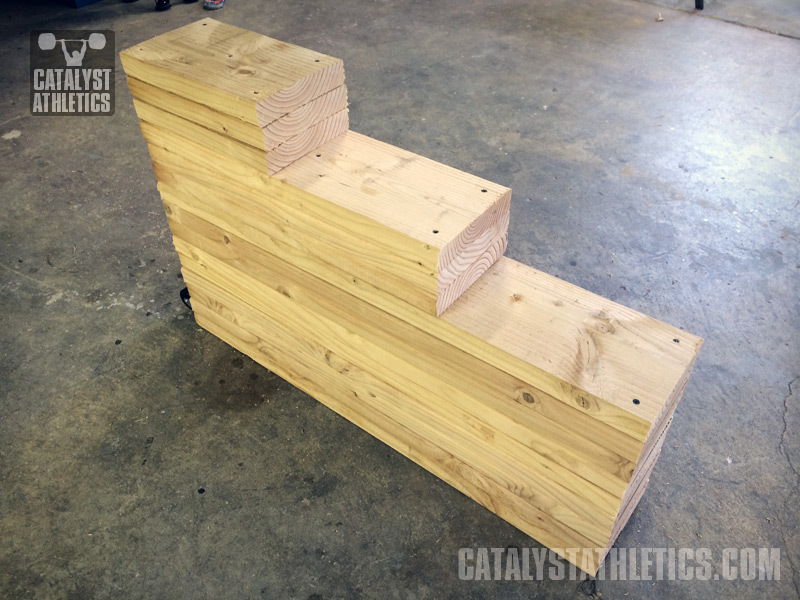
Cut (9) 3’ lengths from the 2x8s. These will comprise the base level. Set aside (4) of the remaining 2’ lengths for the middle section. Cut (3) 1’ lengths from the remaining 2x8 for the top section.

Find any of the 3’ sections that heavier than the others—we’ll use those at the bottom. If your wood curves a bit (when you’re buying $6 2x8s like I do, you’re bound to get some pieces that aren’t perfectly flat), make sure the curve faces up so the base won’t rock on the floor.
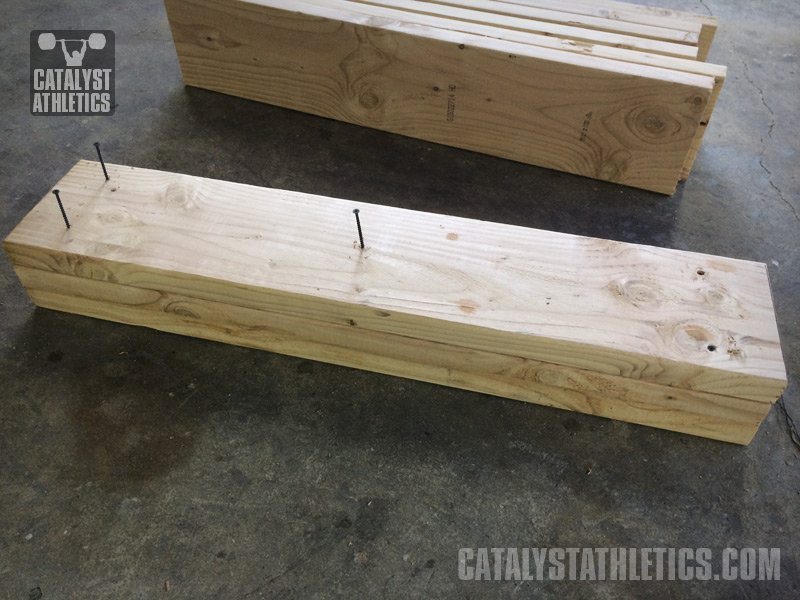
Stack two of the 3’ pieces on top of each other. Pre-drill and drive some screws down into the bottom pieces through the top piece. (You don’t need a lot of screws here—all force will be pushing straight down onto the stack. Same goes for the question of glue—you can if you want, but I wouldn’t waste your time, and screws only means later down the road, you can easily add or remove boards to change the height.)

Continue adding one 3’ board on top of the stack and screwing it to the piece below until you have all nine boards fastened together.
Then continue the process with the 2’ pieces aligned with one end of the 3’ stack, and then the final level with the 1’ pieces.

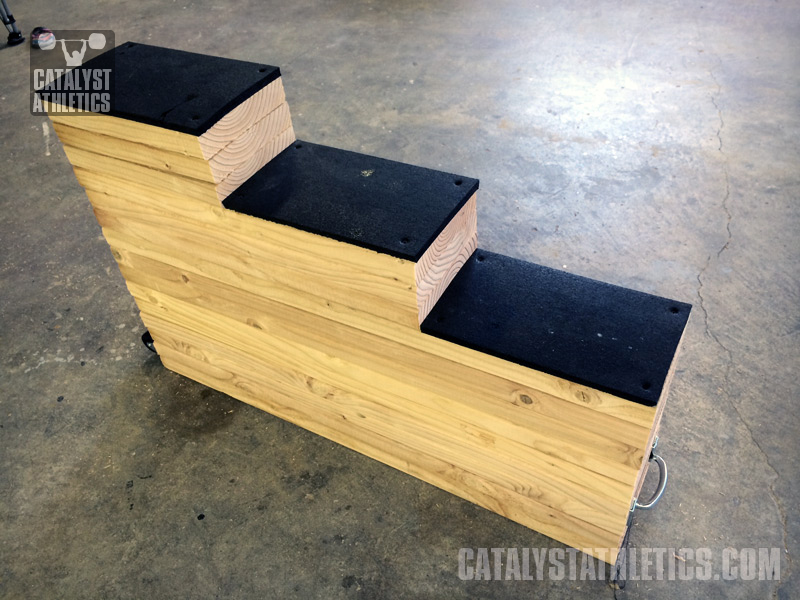
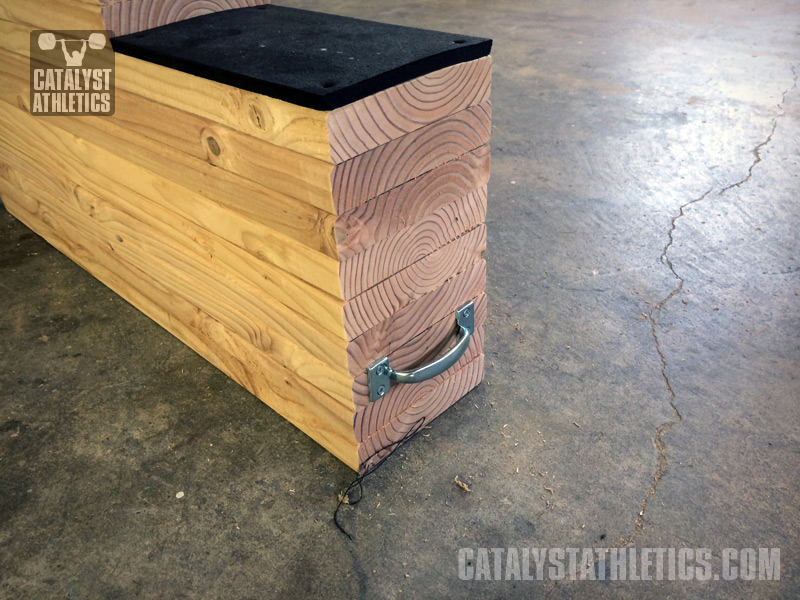
Next, trim the rubber to fit on top of each section (this will be 7.5” x 12”). Screw it down in the corners only so the bar never lands on a screw head. (See top photo)
With ½” rubber, this setup will give you heights of 14.5”, 19” and 23.5” (Remember that 2x8s are actually 1.5x7.5”). Obviously you can adjust these heights for yourself or your lifters, but this is about below the knee, at the knee, and mid-thigh for me (I’m 5’ 11”).
With ½” rubber, this setup will give you heights of 14.5”, 19” and 23.5” (Remember that 2x8s are actually 1.5x7.5”). Obviously you can adjust these heights for yourself or your lifters, but this is about below the knee, at the knee, and mid-thigh for me (I’m 5’ 11”).
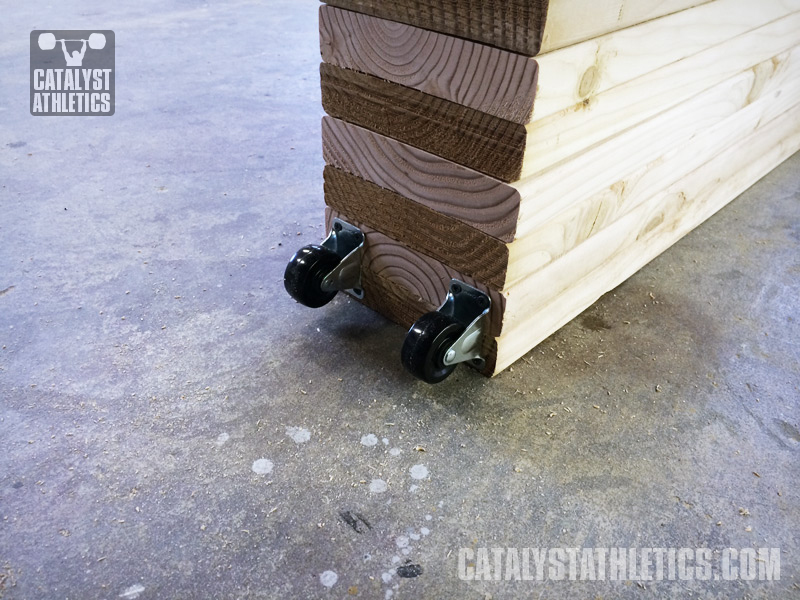
You can stop here, but I would recommend adding casters and a handle because this thing will be heavy. Screw the casters at the bottom edge of the tall end, and the handle at the short end, high enough from the floor that you can easily get your hand into it without scraping your knuckles off.


What Do I Do with Them?
Now that you have this thing, let’s figure out what to do with it. First, stair blocks are not a substitute for regular blocks. If you want to snatch and clean off blocks, get real blocks.
The main reason to use stair blocks is to get a bounce out of the bar. Because the bar is supported only in the middle, it will whip around that point. That means that when you return the bar to the block, it will bend and rebound, which means it will have some “speed” as it first comes off the block. Basically, it’s like lifting a bar off the blocks in the sense of an elevated starting position, but it has momentum on it already as if it started at a lower point. Of course, you only get this after the initial rep—although I have cheated this by lifting the bar off regular blocks, walking to the stair block or bench, and then starting the set from the top rather than from the bottom.
A strong bench can be used instead of stair blocks to do what we used to call bench pulls. The downside is that benches are a bit wider and sometimes the inside of your legs will contact it, and the height isn’t adjustable. The upside is that in between sets, you can sit down right where you are. If you have a bench and don’t have space or money for stair blocks, it will do.
The only exercise I see a reason to do on stair blocks is snatch or clean pulls. The main purpose would be to overload the upper end of your pull (e.g. starting from below the knee, the knee or above the knee) but in a way that allowed more speed or a better extension with heavy weight. In other words, you can do partial pulls from blocks, but each rep would begin from a dead stop, which is much more difficult, more taxing, and slower than doing stair or bench pulls with the added momentum from the bar whip. You can also use them as a way to do partial pulls with a controlled return to a pre-determined height without resetting the bar on the blocks (in other words, just touching lightly to ensure you got to the position desired)—having only a single point makes this much easier, as it’s hard to get both ends of a bar to land on blocks at exactly the same time, which then throws you off balance.
You can do power snatches and power cleans from them as well (don’t try to squat or you’ll be very unhappy). However, you can do the lifts from blocks, power or squat, more safely and without the restriction (mental or physical) of something between your legs. That said, world class lifters do power snatches and cleans from the blocks under the direction of world class coaches, so I won’t dismiss them.
If nothing else, doing some pulls from the stair blocks using the whip of the bar will give you some variety occasionally in your training, which can be as helpful mentally as physically.
Here are a couple videos of snatch pulls from stair blocks using the rebound of the bar:
But What About My Bar?
If you’re thinking that bouncing a heavily loaded bar onto a narrow block is going to wreck your bar… you’re probably right. I won’t let anyone do stair or bench pulls with our Werksan bars. We have a couple less expensive bars that are already a little bent, so those are the only bars for this. I would suggest you do the same. If you only have one bar, and you don’t want it bent, I would suggest not using stair blocks at all—you’ll be just fine without them.
